Getting Started
Creating a Plugin in the Stripo account
To create the plugin application, please follow the steps below:
Open the site: https://stripo.email/plugin/
Click on the “Get started for Free” button;
Create your own Stripo account or open the current one;
Go to Settings > Plugin and press “Create application” button;

Add the Name of the plugin and company website (*required);
Done. You have created the plugin.
The code sample that displays the editor in your environment can be found in the Quick Start section. You can download or copy it from the repository.
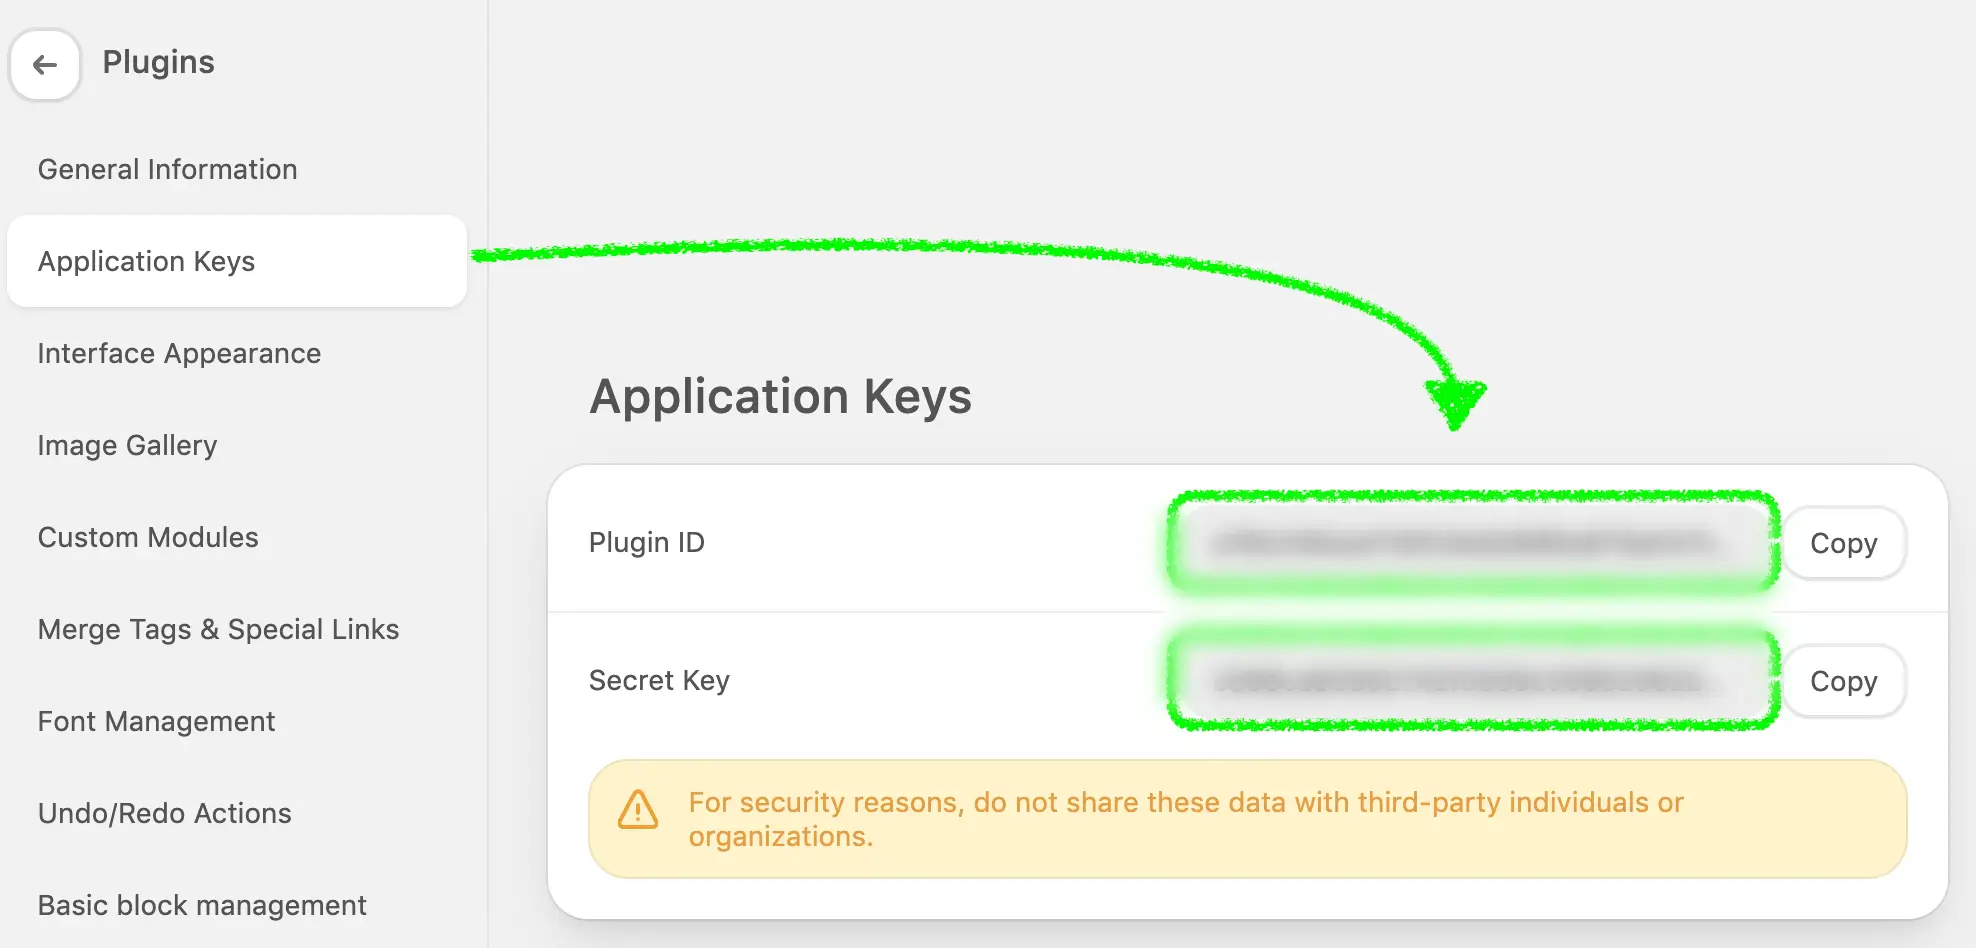
Please notice, you have to add your own Plugin ID and Secret key from the app to the code.
Connecting the Editor
Connecting the editor is a straightforward process consisting of several steps:
Preparing the editor space
Determine where the editor will be placed in the HTML structure of your application. Use a container with a unique identifier for this purpose. For example:
html<div id="stripoSettingsContainer"></div>Adding the editor script
Add a
<script>tag to your application to load the Stripo editor code. You can load the latest version of the editor or specify a particular version if needed.For the latest version:
html<script id="UiEditorScript" type="module" src="https://plugins.stripo.email/resources/uieditor/latest/UIEditor.js" ></script>For a specific version of the editor:
html<script id="UiEditorScript" type="module" src="https://plugins.stripo.email/resources/uieditor/rev/[version]/UIEditor.js" ></script>To check the available versions of Stripo Plugin, please refer to Release Notes (make sure you’re viewing the versions of the new Plugin).
Initializing the editor
Use JavaScript code to initialize the editor with your chosen configuration in the specified container on the webpage.
jsconst domContainer = document.querySelector('#stripoEditorContainer'); const stripoConfig = {...}; window.UIEditor.initEditor(domContainer, stripoConfig);You can find all supported parameters for the plugin configuration in the Initialization Settings section.
Once the initEditor function is triggered, the user will see the editor displayed on the UI as shown in the image below.
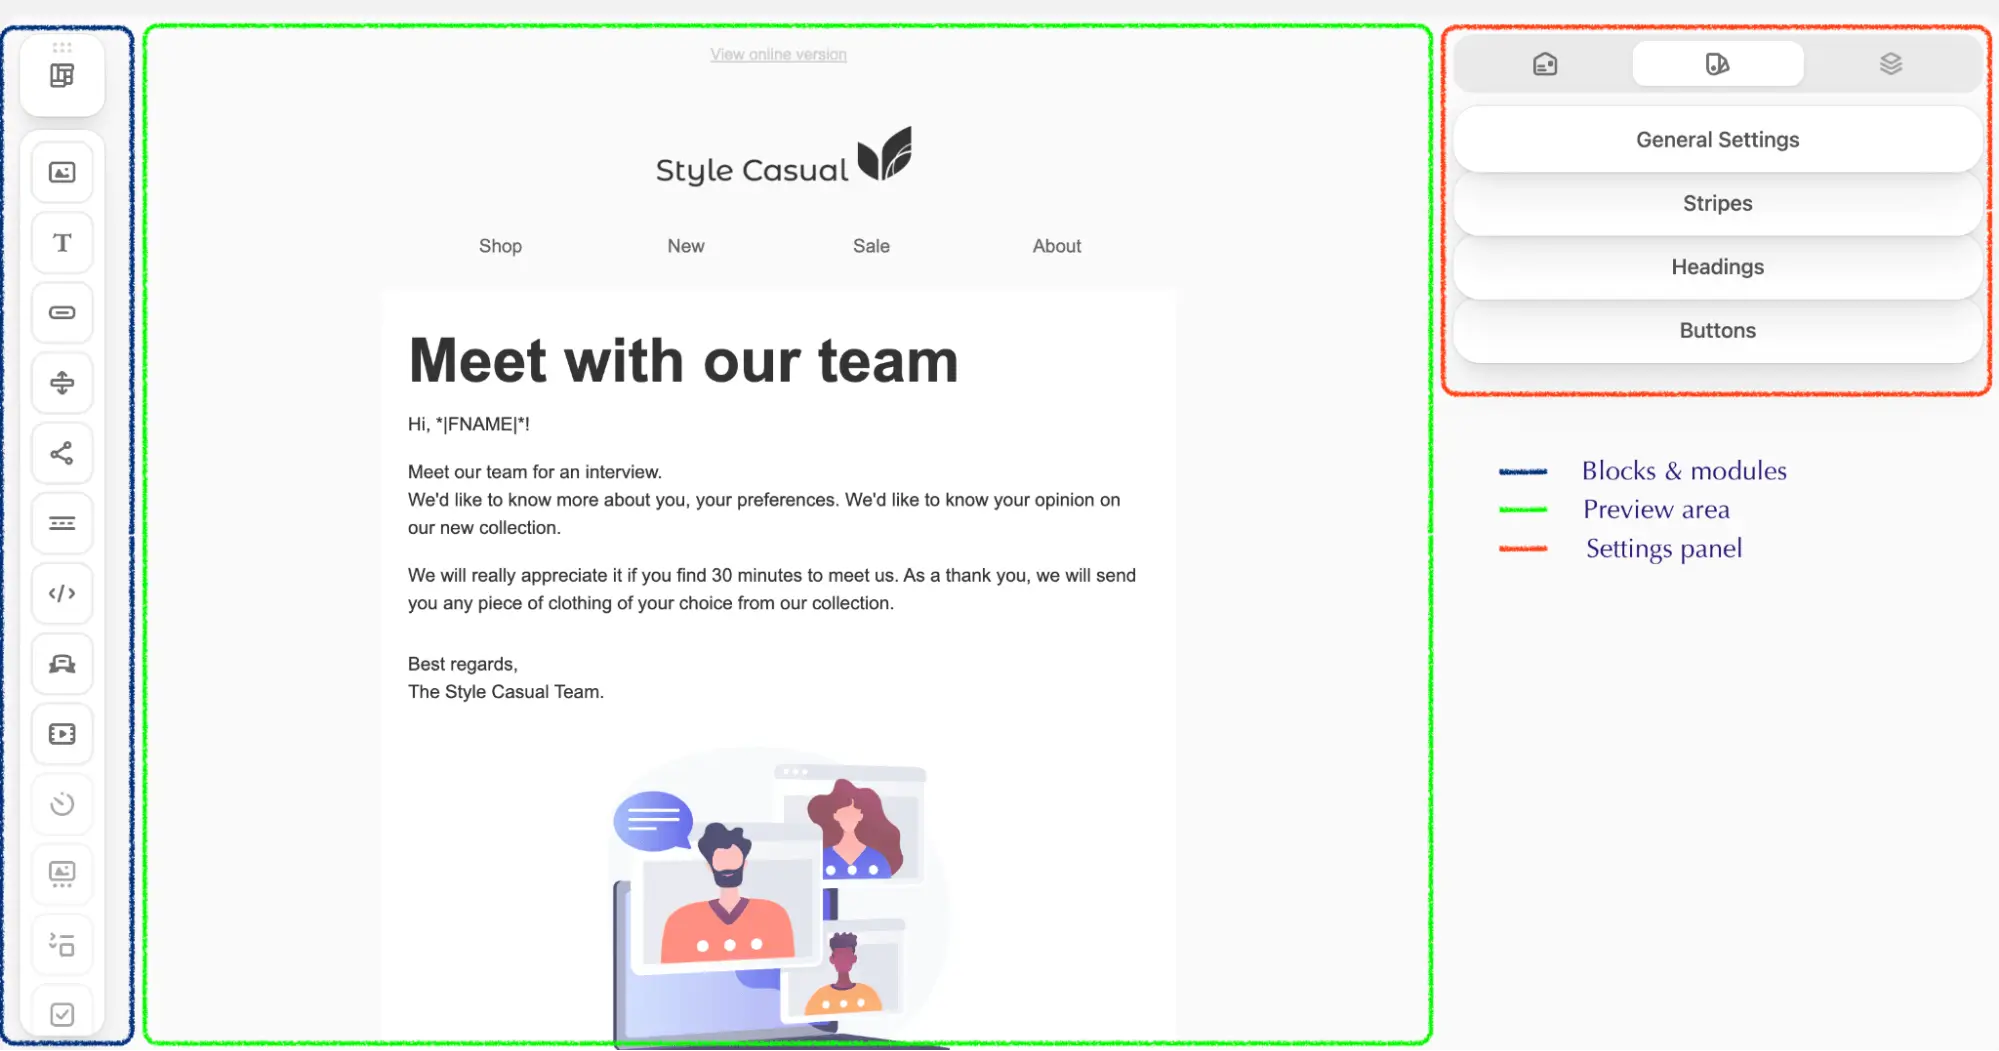
Please be advised that you can control the default position of the Settings panel and Blocks and Modules panel by passing
panelPositionparameter while plugin initialization. It may have two possible states:- ”BLOCKS_SETTINGS” — blocks and modules panel on the left, settings panel on the right;
- ”SETTINGS_BLOCKS” — settings panel on the left, blocks and modules panel on the right